Assembly of the wing had many components and many problems with them.
These included:
Installation of the wing tank components:
Filler Cap Body
Drain Plug
Drain plug fairing
Leading Edge of Wing
Addition: Fairings for the aileron cable outlets on the wing upper surface.
Fuel Filler Cap Installation
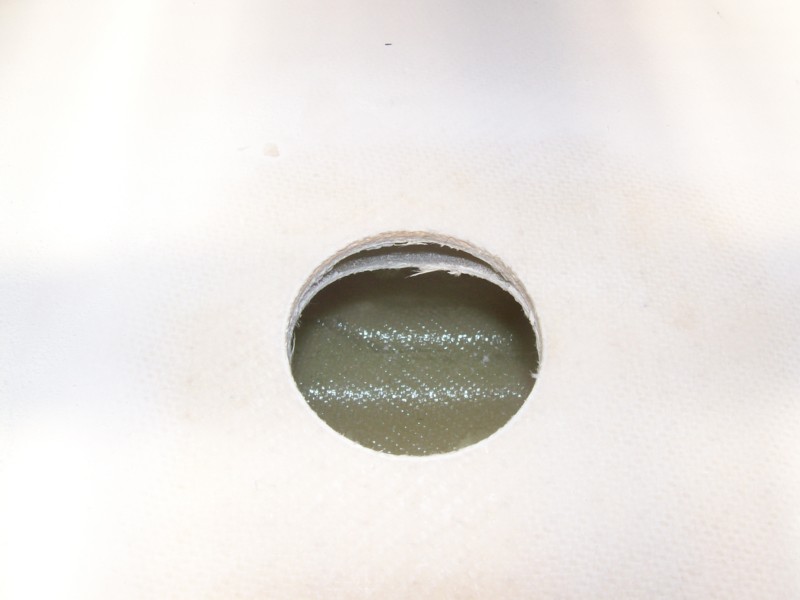
Cutting the hole. The instructions give measurements for where to put the hole. I "measured twice, drilled once" as the saying goes and still had problems.
The hole ended up cutting through the tank forward of where it drops downward to form the front wall. This meant I had a crescent hole about 1 cm wide in front of the body filler which I then had to fill in so that fuel could not leak into the wing itself.
This tank is smaller than it should be. I did two fuel calibrations on it and it holds only 60 litres instead of the stated 67 litres. This might be why it seems to have been placed with the front wall too far back. I don't know what the answer to preventing this big hole is. Perhaps to cut the outer skin very slowly and checking every few turns of the hole saw until the skin is separated and then check where the tank upper surface is. If the hole is too far forward then you could glue it all back in and start again further back. The trouble with this is that the filler is then further back when you want to fuel up.
The next part of the filler saga. The instructions say to cut the holes so they are stepped so that epoxy/flock is not scraped off when it's inserted. However, when I did this the filler body sat high out of the hole so I ended up having to cut the hole with both the skin and tank the same size.
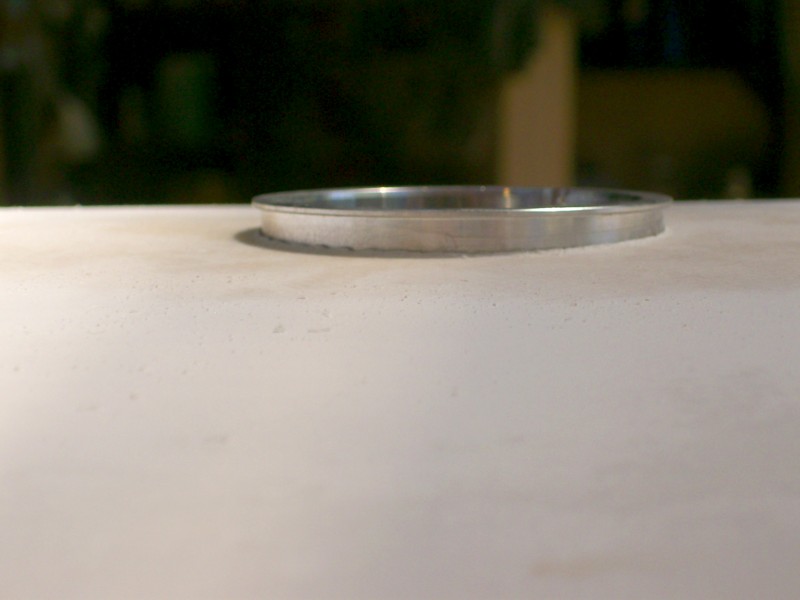
Cutting out the hole for the fuel drain.
You have to install the fuel drain in the under surface of the wing. The instructions say there is a space between the skin and the tank and you have to use a hole saw to carefully cut through the skin and stop before you go through the tank.
This is not entirely true. The space varies from no space at all to a full gap. One of my tanks, despite carefully stopping and checking every few turns of the saw, had no space at all and so the saw cut through into the tank. I then had to re-epoxy the piece back in place and fix the defect.
The second tank had a small gap in part of the area of the hole and no gap in some part.
In retrospect I would have been better off drilling out the centre hole and stopping before the hole blade started cutting the skin. Then inspect through the small hole and see if I could see any gap. Knowing then that there was no gap I could have tried more carefully to lift the skin off before the saw cut through the tank as well. However, given that the two were fused solidly together I suspect I still would have had the same trouble.
Fuel Drain Covers
Both wings require you to epoxy a small cover (small tear drop shaped cover) over the drain once installed. I had two problems that didn't become evident until after the wings were installed.
1. The drain cover on the left wing stopped the rear passenger door opening. It was just a bit too low. However it was just minimal enough that I was able to heat the drain cover up with a heat gun and squash it a bit. But if you look at it you can see it has been compressed somewhat unevenly. It would have been better to have installed it so it was not so high.
2. The cover requires you to drill a hole in it for access to the drain itself. You have to ensure the hole is nice and neat and central but more importantly it has to be big enough to allow your draining device to actually fit through the hole.
I didn't have a device until after I had completed the plane then went and bought one of those long thin clear tubes with a centre post for depressing the valve (and a screw driver bit in the other end). When I then tried to drain the fuel the centre post was too short and the cylinder was too wide to fit through the hole!! I had to grind back the castellated end of the drainer to make the post long enough and then had to grind out the hole (and so wrecked the paint). So get yourself a drain device first and make sure it all fits before you paint.
Leading Edge of Wings
When I came to prepare the wings for painting I noted there was a raised edge about a centimetre wide running the full length of the leading edge. I phoned Jabiru for advice as to whether this could be sanded back. They advised a minimal smoothing sand was all that should be done and then filler used to build up and smooth out the step. So I very carefully gave it a smoothing sand only to find multiple pinholes appear where the upper skin joined the lower skin.
Further inspection with a strong light showed minimal epoxy for almost the entire length of both wings. I further contacted Jabiru who simply advised to use filler in the holes and bog it up.
I was pretty unhappy about that as I was concerned the if the surface were hit by rain, or debris that it could punch a hole through and cause a splitting force on the skin. So I elected to add two layers of glass ribbon the full length of the wings and completely fix the problem.
The job itself was not difficult but just time consuming, and no doubt added some more weight to the aircraft.
Aileron Cable Fairing
The wing has a hole in the upper surface for the aileron push-pull cable to exit before attaching to the aileron pitch arm. I was wondering whether it would let water in the wing and when I was emailing with another builder he confirmed he had problems with water getting and unbalancing his aircraft. He had to find where it was trapped and drill a hole in the skin to let it out. When I bought my kit there was no fairing for this and it appears there is still none as part of the standard kit.
It appears the biggest problem is when the aircraft is standing out in heavy rain. In flight I suspect most water would be swept off by the low air pressure over the wing.
Anyway, after discussing it with the other builder I made some fairings out of fibreglass. If you don't want to make your own I have since seen them for sale on Vic Leggott's UK web site. (See the Links page)